Field is the 3D workspace for one Hunt Area. It puts the terrain, current imagery, your own Marks and Reckonar’s analysis in one place. In this guide you will move around the ground, open Layers, turn on one analysis layer, read its legend for what it really says, inspect a few features and check whether you are looking at current conditions or a saved Plan.
Open the area in Field
In Scout, open Hunt Areas, select your area’s card and choose Open in Field. You can also open the workspace switch, which reads Scout while you are on the map, and choose Field. Field always opens on current conditions with no Plan mounted. The rail holds Plan, Layers, Mark, Content and Tools, plus Jobs and Help. On a phone they sit in the bottom bar and the header.
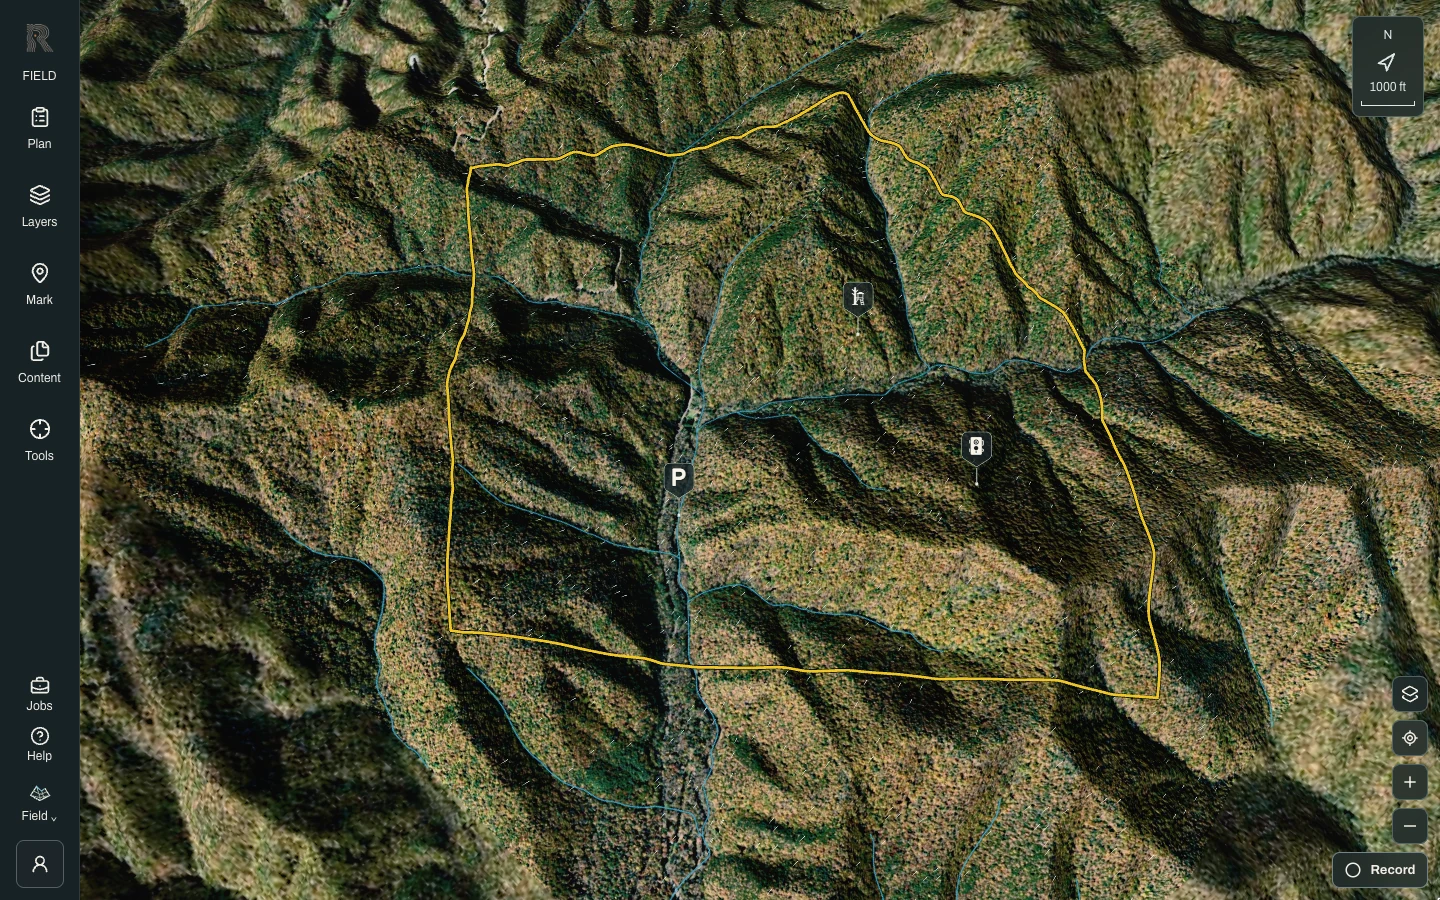
Move around the terrain
On a desktop, drag to rotate the view, right-drag to pan and scroll to zoom. The keyboard also works, with W, A, S and D or the arrow keys to pan, Q and E to rotate, and plus and minus to zoom. On a phone, drag one finger to rotate, and use two fingers to pan and pinch to zoom. The north arrow and scale box in the corner show which way is north. Take a minute to find a ridge, a drainage and a field edge you know.
Turn on one analysis layer
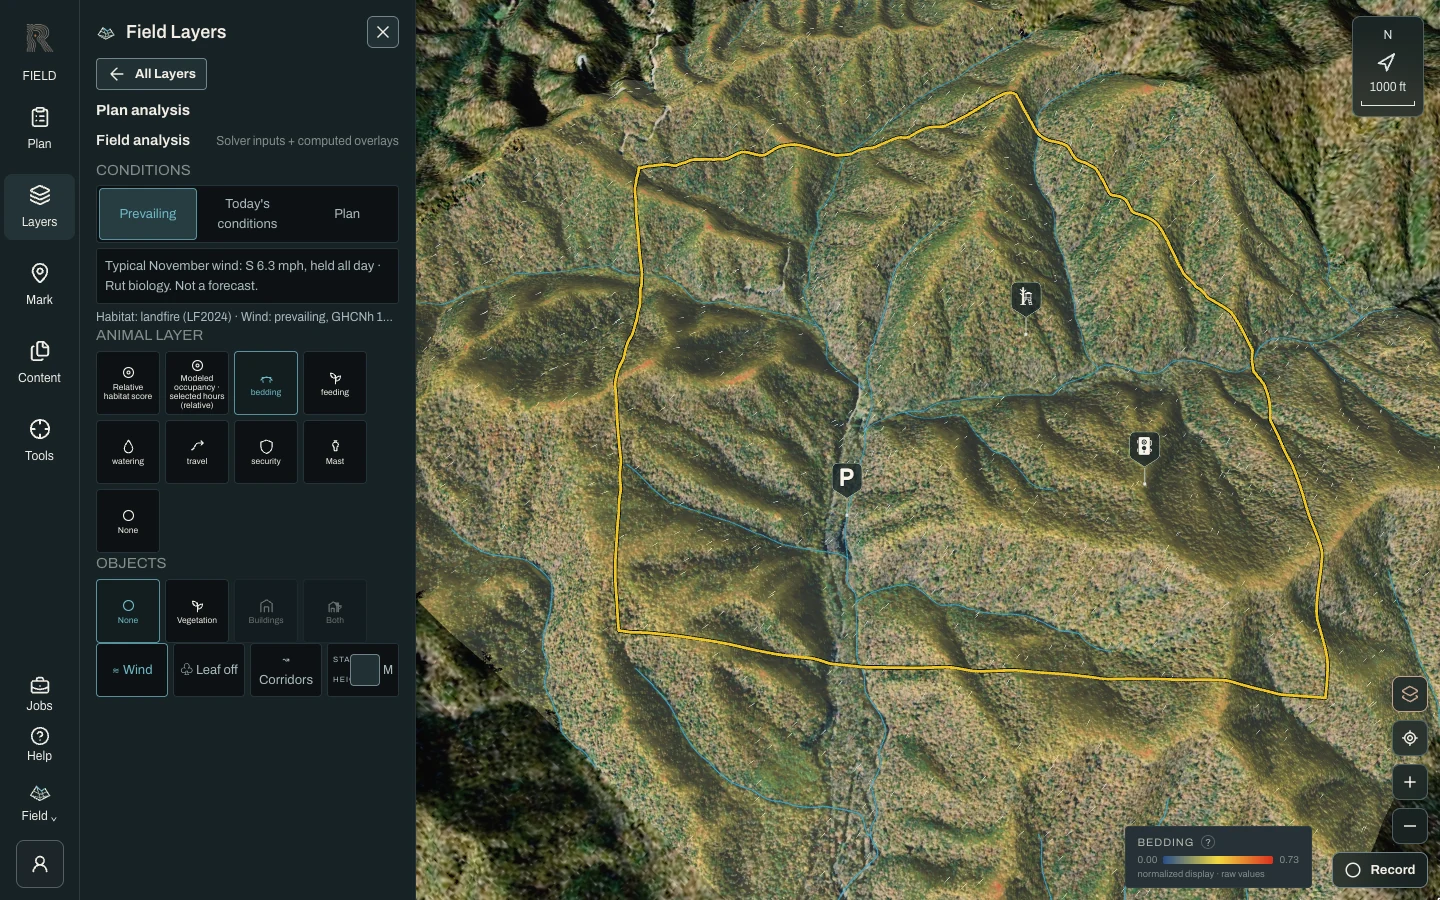
Choose Layers. The top of the panel picks the Basemap (Satellite, Relief or Historical), and the sections below hold the analysis. Choose Plan analysis, then under Animal layer choose Bedding. The terrain takes on a color drape, and a legend appears on the map. The same grid offers a relative habitat score, modeled occupancy, feeding, watering, travel, security and Mast, and None clears it. Only one analysis layer shows at a time. Overlays such as Wind and Corridors can stay on with any of them.
Read the legend, not just the colors
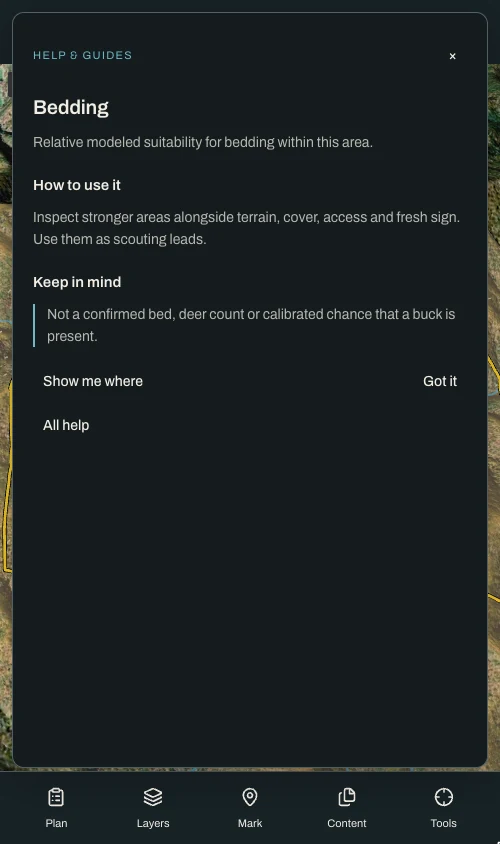
The legend names the layer and shows a color bar from the lowest to the highest value in this Hunt Area. Its note says the display is normalized and the numbers are raw model values. The colors are stretched to this ground, so they compare places within your area, not one area against another. Select the ? beside the legend title for a short explanation. For Bedding, it describes relative modeled suitability for bedding, and it says the layer is not a confirmed bed, a deer count or the odds that a buck is there. If the legend reads “No modeled effect”, the layer has nothing to show here.
Inspect what you see
Open Layers, then Terrain mobility. Where LiDAR covers your ground it offers Natural benches and Travel surfaces, and where the terrain has them, Saddles and Drainages. Click a marked feature to open a details card. A bench card, for example, gives its size and slope and says it is a terrain hypothesis only, not proof of a road, legal access or deer use. Click one of your own pins to open it in Content. For distances, open Tools and choose Measure distance, Measure area or Measure radius.
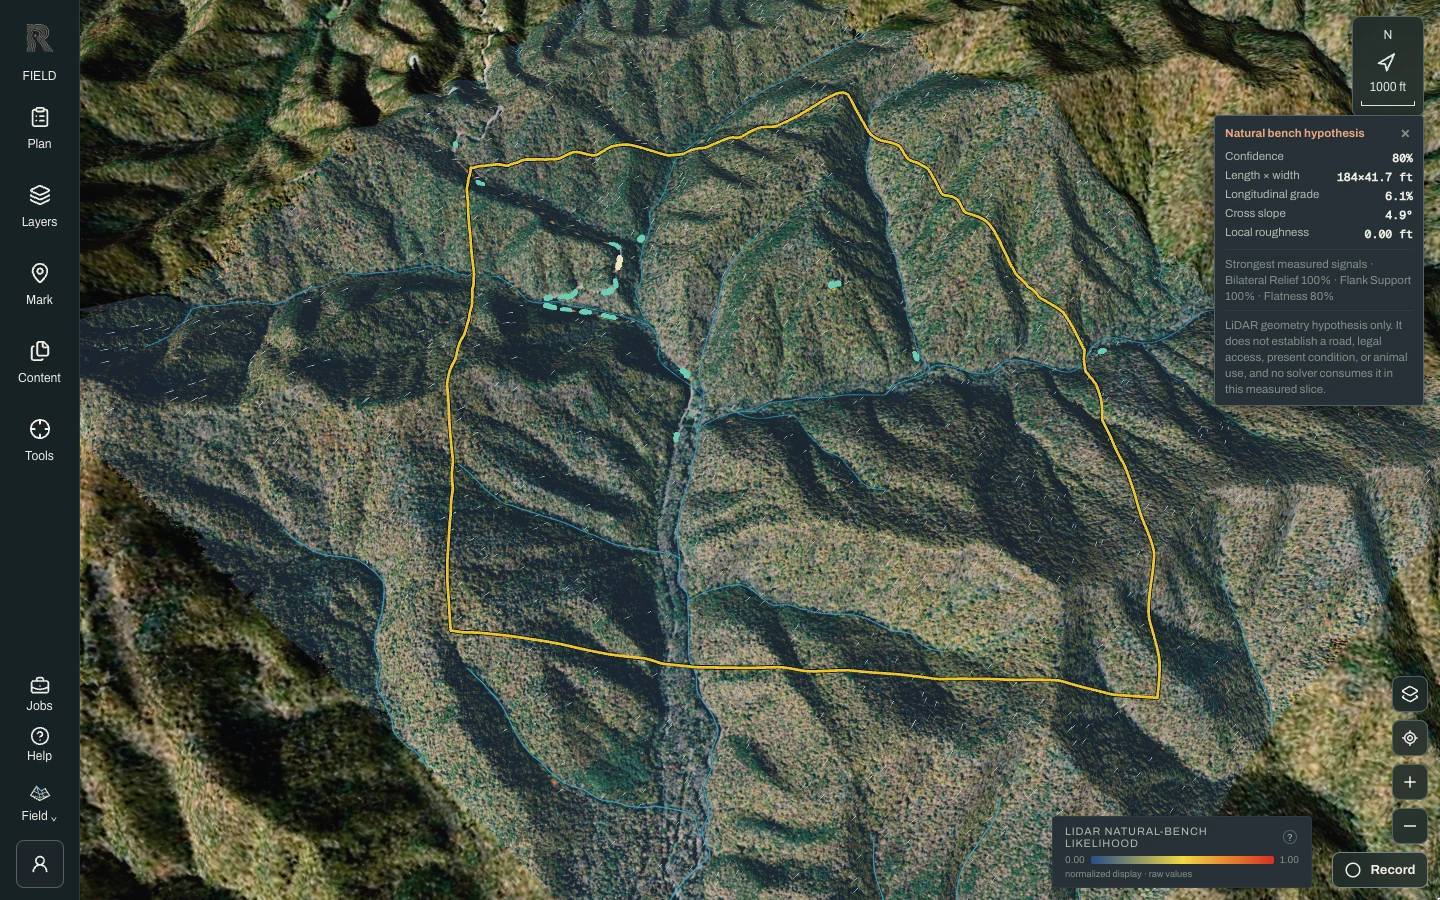
Know which conditions you are looking at
At the top of Plan analysis, Conditions has three choices. Prevailing, the default, holds this month’s most common wind steady all day; it is a typical-conditions estimate, not a forecast. Today’s conditions uses today’s forecast hour by hour and builds only when you choose it. Plan shows the layers a saved Plan computed, and it becomes available once this area has a Plan. The line under the selector says exactly what the layers show. When a Plan is mounted, Exit Plan returns you to current conditions.
Check it against what you know
Now do the part only you can do. Walk the model across ground you have hunted. Where it agrees with your experience, you have a reason to trust its read of ground you know less well. Where it disagrees, you have found something worth recording. Use Mark to put what you know on the map; Plans and Ask Reckonar both use it.
- Modeled layers are relative and uncalibrated. They rank places within this Hunt Area; they are not probabilities, deer counts or harvest odds.
- Resolution and available inputs limit what a layer can show. A small feature can fall between cells, and some optional data sources are not available everywhere.
- The season behind the animal layers follows the Field date. There is no separate season setting.
- Field needs a connection unless you saved the area for offline use first. See Before you head out.
- Nothing in Field shows where a deer is right now. Reckonar is for planning before and between hunts.